How to Make your own Wine at home. 

      Making wine might seem like a complicated process better left for the experts, but it’s actually pretty easy. Making your own Wine is a fun hobby to get into to impress your friends and after a while save you some money.
      Wine making is a tradition passed down thousand of years. Being perfected every step of the way. The process, however, is an easy one. The science behind it is simple enough. A fruity sugary liquid is made and yeast added. The yeast eats the sugars and makes alcohol and carbon dioxide as byproducts. 
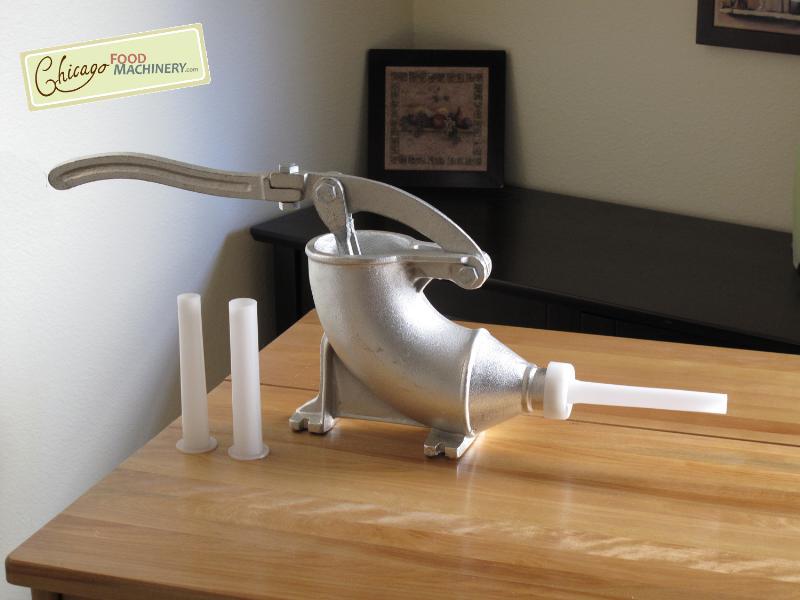
    I would reccomend buying a 5 gallon wine making kit off of the internet. They usually include a fermenter, a hydrometer, an airlock, a wine corker and other essential equipment for wine making. Brew stores are becoming a common place now, so you could find one near you and get even more advice on the process and what to get there. 
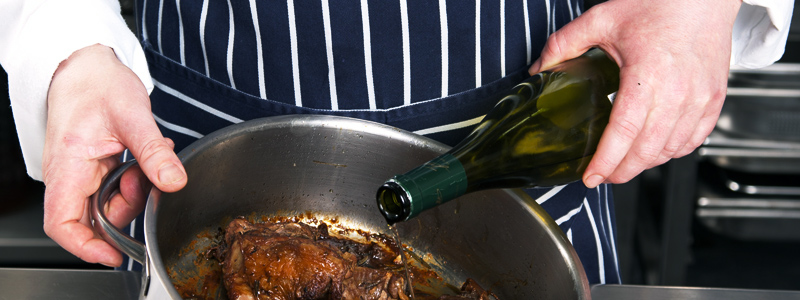
      First off, you’ll have to determine the wine you’ll want to make. I would actually reccomend buying grape juice from your homebrew store, or buy a different kind of juice at the store. Any fruit, or juice, can be fermented usually. If you’re going to buy juice at the store however make sure it comes with no preservatives. Just the juice and vitamin c are okay. Any preservatives can kill the yeast. Right now I have apple wine going. I found some nice apple cider from an orchard nearby and I’m making apple wine. 
       

Once you determime the flavor of wine you’ll be fermenting you need to add sugar to increase what’s called the gravity. The gravity is the density of sugar in your wine. The hydrometer that comes with your wine kit is the tool you’ll need. Fill up the test tube and place the hydrometer in it. It’ll have numbers down the side like 1.100, 1.050 and so on. The gravity will determine a few things. It’ll determine the alcohol potential of your wine. For example a liquid with a starting gravity of 1.050 could ferment to 6.5%. You can add more sugar to get a higher ABV. You’ll also want to take into account how sweet you want your wine. 

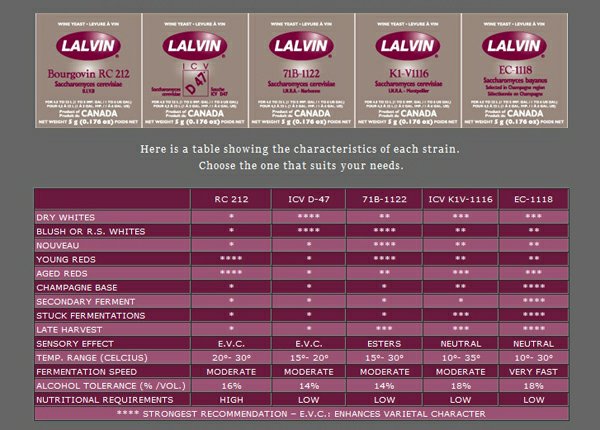
      The yeast is a living microorganism. It’s goal is to eat all the sugars it can until the alcohol level is high enough that the yeast is killed. Yeast comes in many strains. I when making wine use lavlin wine yeasts, because it’s easy and there are many charts on which strain to use for what. If you have a wine with a 12% ABC potential, but your yeasts tolerance is 14% than you’ll have a totally dry wine. If you have a wine with a 16% ABV potential and the same yeast you’ll be left with a sweet wine. You just need to determine what kind of wine you want and edit the sugar levels from there. 

      Once you have your sugary juice to the sweetness you want according to the hydrometer dump it into your fermenter. Now you’ll want to vigorously shake the fermenter to incorporate all the oxygen you can, this will help in the first few hours of fermentation when the yeast is rapidly reproducing.  

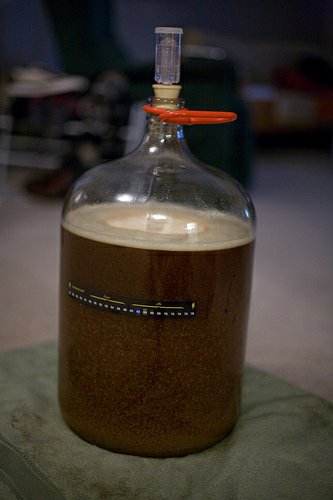
This you’ll want to place in a warm place, the yeast packet will tell you what range is best for it. Once your wine is around that tempature pitch your yeast, just sprinkle it on top. Now put in the airlock and let sit. The airlock is a small device that lets the carbon dioxide escape, bit doesn’t allow air in. You’ll see carbon dioxide bubbles within a few days or hours passing through it. 

     Now every step along the way you’ll want to make sure that everything is clean and sterile. I use starsan that comes with a lot of kits. It’s a sanitizer made for brewing that you don’t need to rinse off. Sanitation is big when making your own alcohol. You want to avoid bacteria that can make your wine sour or into vinegar. 
      I usually let my wines ait for about 2 months in 5 gallon increments. This gives it enough time to ferment and the yeast to clean up after itself. It’ll mellow out in this time as well, young wine is incredibly sharp. 
      Now take another gravity reading and this is your final gravity. Go on Google and look up an ABV calculator and enter both numbers into the box and it’ll tell you what your ABV is. I find 14% to be a nice number for most wines. 

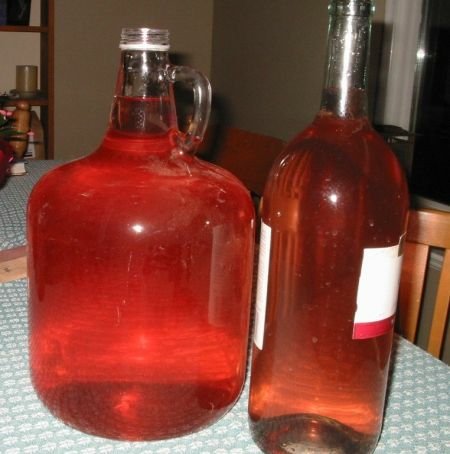
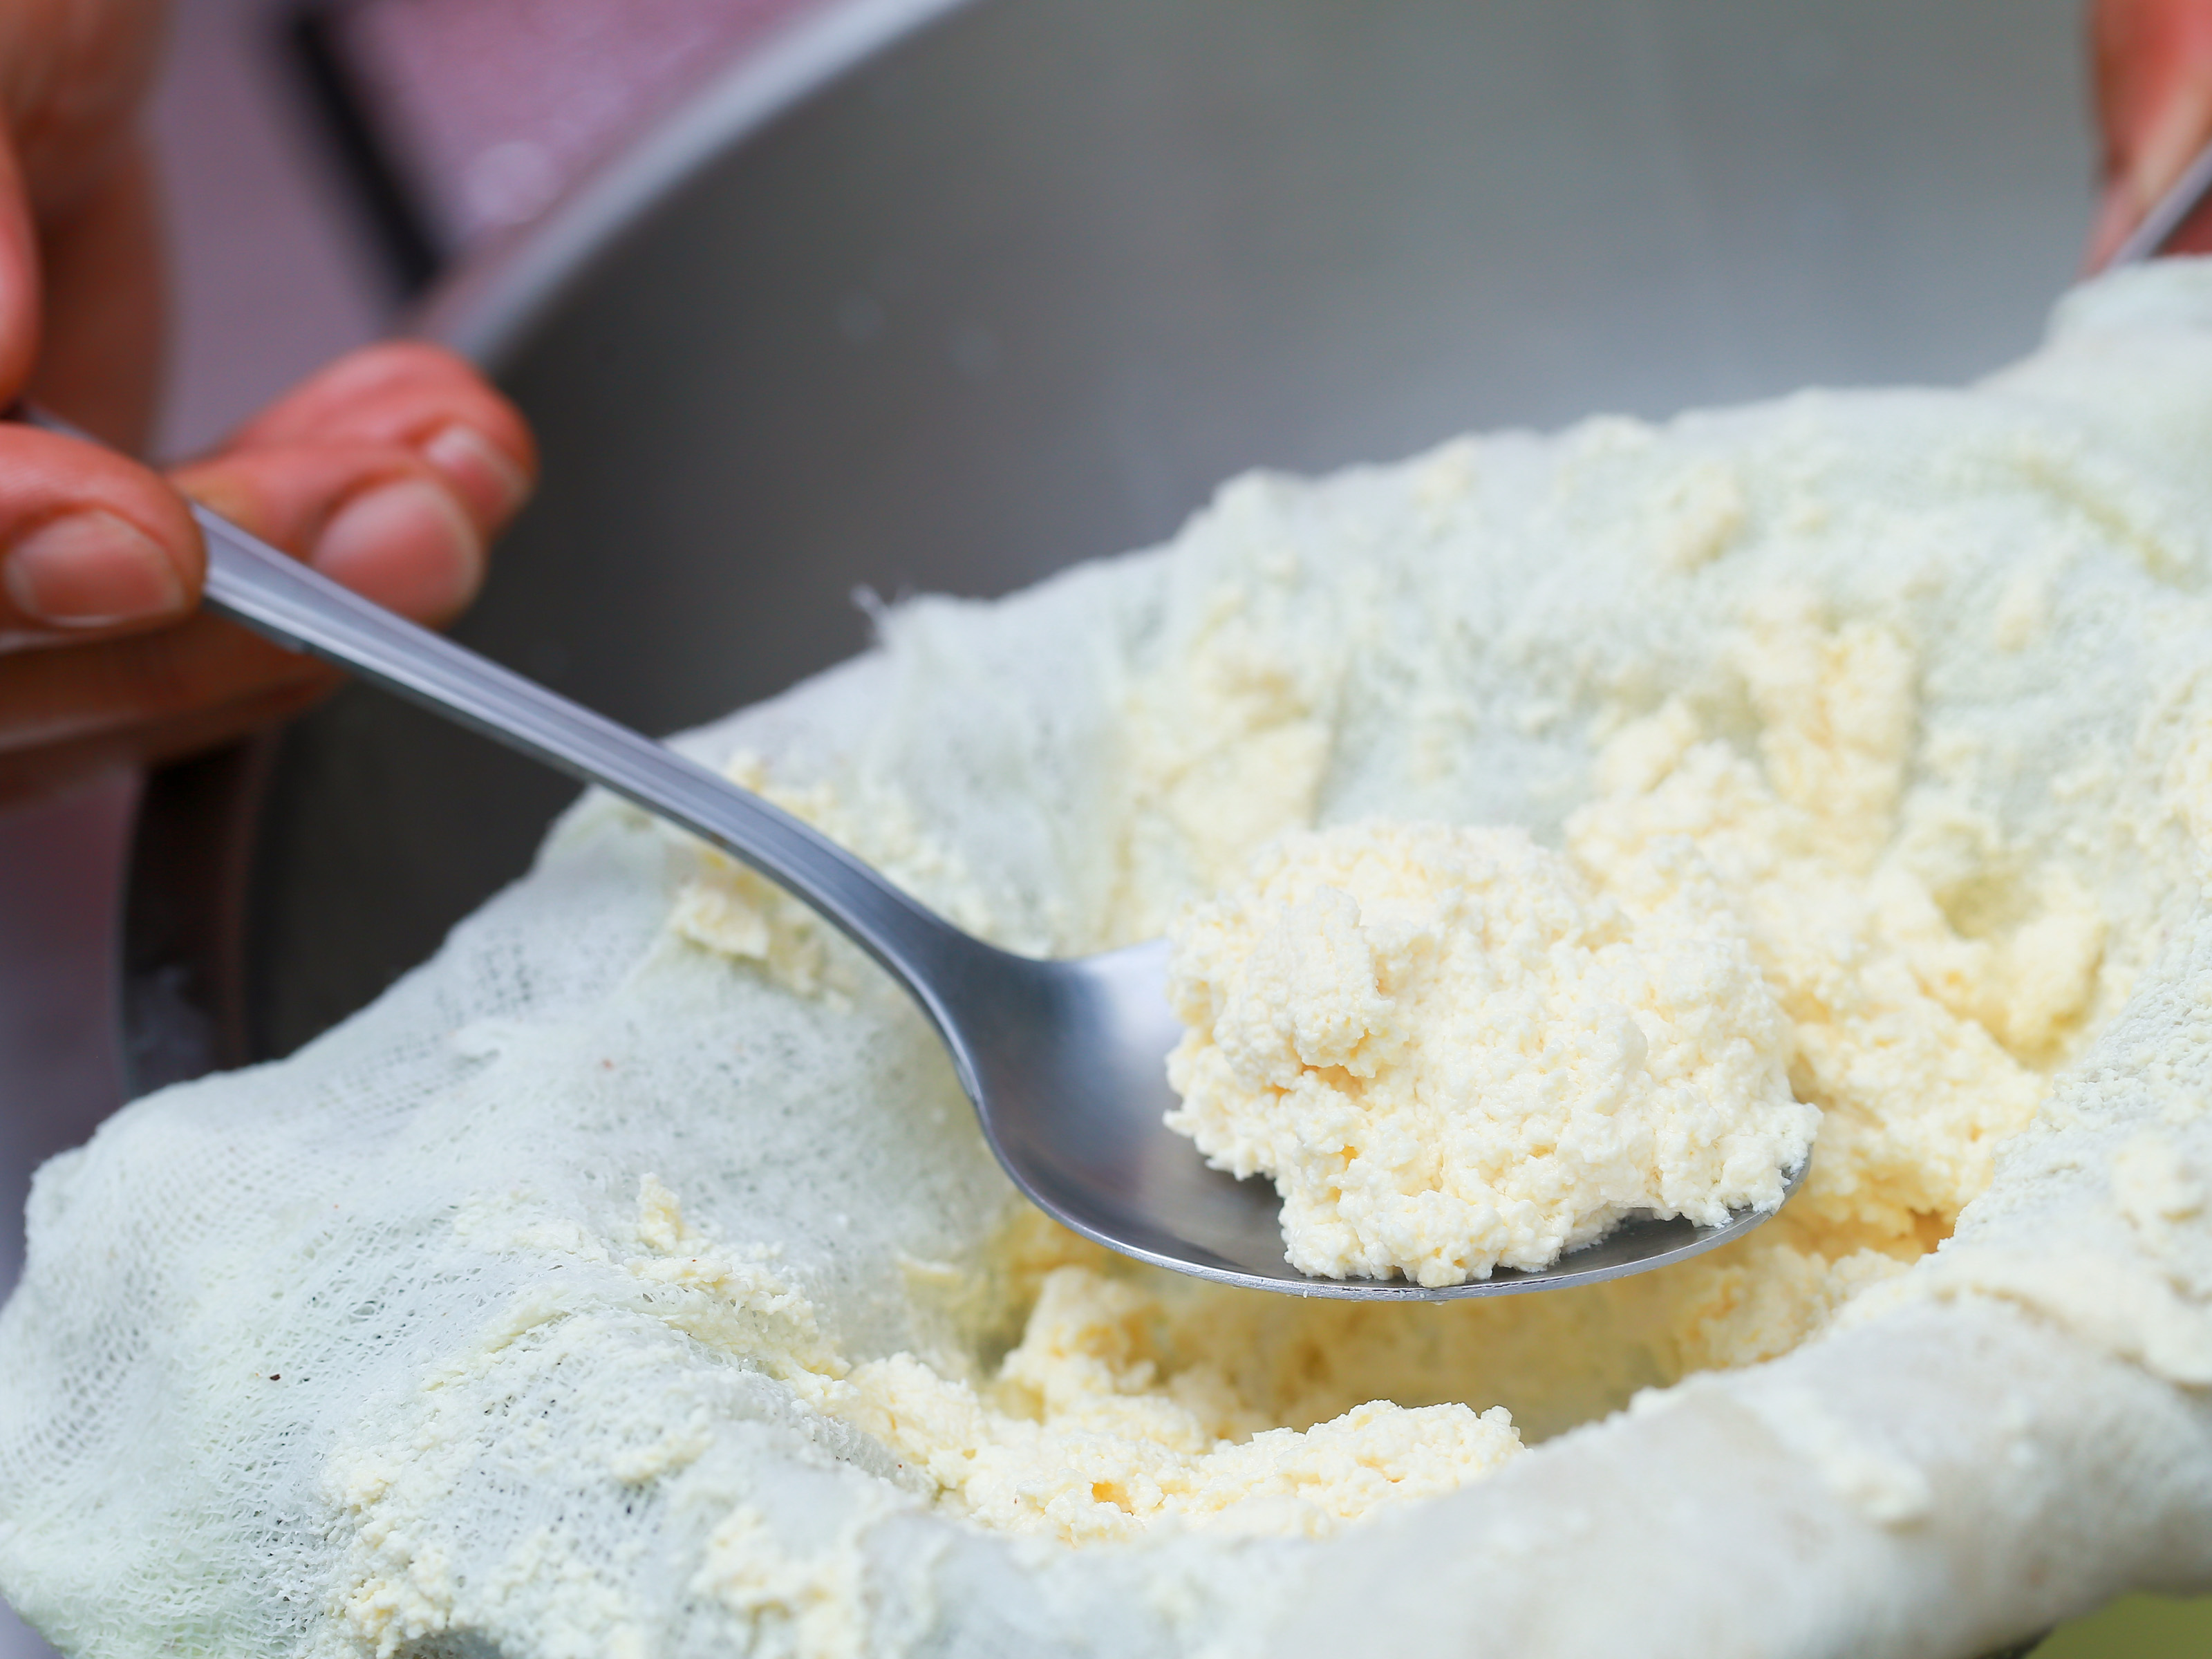
     At this point pool at your wine to make sure it’s clear. If it’s still cloudy let it sit longer and clear or buy some fining agent to clear it much quicker. Then it’s good to bottle. When bottling make sure to avoid the bottom one inch of your fermenter. This is where your yeast cake will be and you don’t want any of that making it’s way into your bottles. It can cloud it up, but it’s not dangerous. 

      Once I’ve bottled it I let it sit for another month and drink. It’s really easy, especially once you’ve done it once. Don’t be afraid to make some mistakes along the way it happens. 
     For more patient people I reccomend making a batch of mead. Mead is honey wine. Just dissolve honey into warm water until it’s the proper gravity for what you want and add your yeast in the same way. I say this requires patience, because you need to let this sit for a year. It’s like jet fuel for a long time then by the year mark it’s a golden delisuous beverage. 

     Fermenting your own Wine is a really fun project. It’s easy especially after your first time and you can make 5 gallons of wine for a significantly cheaper margin than buying at the store. This is after you’ve bought your equipment. You have complete control over flavors and preference. You get to make wine the way you like it and you get the knowledge of the science of fermentation. 
      I reccomend anyone give this a try. If anyone has any questions let me know, or if you’d like a more detailed look on any steps or equipment. 

Lamb Ragu with Ricotta Cheese and Mint 

A simple slow cooked ragu is simple and tasty. Once you get it going you just let it simmer away for a few hours. This recipe is for a lamb ragu, however the method will work for any ragu you would want to make. Rabbit ragu is also fantastic.
It’s simple in the method as well as the food and equipment you’ll need. What you’ll need:

Olive Oil 

Onion 

Carrot

Celery 

Fennel

Salt/Pepper

Oregano 

Thyme 

Rosemary 

Mint

Red wine 

Diced or ground lamb 

Tomato paste 

Canned tomatoes 

Pasta 

Ricotta cheese 
First of all you’ll make you’re mirepoix. Dice your onions, celery, fennel and carrot. In a large pan sweat your vegetables in olive oil and season. 

Now you’ll chop and add your herbs. I tend to go moderate on the herbs. This can make the difference between an okay and a really good ragu. Depending on the protein you’ll be using in the ragu adjust what herbs you’ll use. For this recipe I use oregano, thyme and rosemary. Lamb is a gamey protein so you’ll want herbs that can stand up to that. I love basil, but it doesn’t add much adding it now. It’s too light and delicate for this recipe to come through enough in the final flavor of the ragu.

Add your tomato paste at this point. Stir it around and let it fry out. Let most of the moisture cook out. This will create a fond on the bottom of your pan. The stuff thats kind off cooked onto the bottom. Now you’ll want to deglaze this with your red wine. I just use a simple table wine. 
Add your canned tomatoes and water. Now is when you let it simmer for hours. Cook until your diced lamb is falling apart. If you used a minced lamb this would take less time, however the texture of the chunky lamb is nicer. Gently simmer don’t let it boil. Adjust your seasoming at this point.
For this recipe and ragus in general, use a bigger pasta. I prefer a short pasta like a penne or papradelle. Fresh pasta is perfect for this kind of recipe. Cook it al dente in seasoned water. 
In a separate smaller pan add as much ragu as you want and your pasta and stir. Let it sit for a minute. It will be extremely hot so it’ll stay warm for a minute. This helps the pasta and ragu come together as one the most they can. 

Ricotta cheese does this a lot of good. The creamy soft cheese with the rich tomato sauce is a match made in heaven. Finish with a little chopped mint and you’re ready to serve. 

Try making your own sausage 

I love making my own sausages. Controlling everything that goes Into them. You can try thousands of flavor combinations, not much as far as limitations go. It doesn’t require a lot of equipment either. All you need is a grinder, stuffer and casings. For the every once and a while sausage maker I reccomend a hand grinder. It attaches to the edge of the table. You can find them cheap and they do well for small batches. 

For larger batches or more often then I would go with an electric grinder. They are around 80 dollars and up, but make things go much more quickly. Another important thing is to keep as much of your grinder parts cold as possible. By this I mean your dye, the spinning parts and the tube it comes out of. Don’t put any electronic components in the fridge. It’s important to keep all this cool to keep the meat cool and firm. When you grind meat with a warm grinder it can make the meat less firm and the fat can melt. This won’t make your sausage as well. The texture will be off. Also when you mix your meat don’t over do it or it will get too warm and the texture won’t be as nice. 

I like to use beef that’s tougher. I like more connective tissue and flavor. Don’t use expensive pork or beef. You can make sausage out of just about any meat. The leaner the meat the more fat you’ll have to add. Lamb sausage is nice as well as venison. Adding fat is easy. Use bacon, or preferably pancetta. This will add a nice flavor and the fat it will need. You need the fat to keep your sausage moist. Do a little research to find out how much fat to meat you’ll want for what you grind. 

Now that your meat is ground properly and has the proper amount of fat content it’s time to season. Salt is a must, I also like to add a good amount of fresh chopped herbs. I decide on what i want dependant on what I’m going for and the meat I’m grinding. For my Italian sausage I use roasted fennel, chopped onions and mushrooms that have been sauteed off and drained of as much moisture as possible. I also use basil, thyme and oregano. I use pancetta and inexpensive pork for this sausage. 
You can also add things like cheese and fruit if you want. Pineapple and dried fruits can be good. Try sharp cheeses thru come through the best. With lamb I like to add dried apricots. 
At this point you stuff your sausages. You put them in the cylinder and press down. The tube will push your mix into your casings. 

When it comes to the casings of choice I always use intestine. It sounds gross, but it gets the job done and is the easiest to use. When you use the synthetic casings you have to remove them before eating them. In my experiance they’re also more of a pain to work with. 
You just need to press down on the lever slowly and constantly. You have to put the casing of the tube. Just press how much you need on it like a spring. The casing will come off the tube, just make sure the meat fills it up evenly. This is controlled by how fast or slow you press down. 

You’ll have a long sausage now. I usually make mine about 8 feet long into a curl. At this point you tie the ends when you’re done. Then you pinch 6 inch segments and twirl to make your links. 

Be gentle when you cook it. You can grill it or as i prefer to cook it all in a pan with a little beer. Let them poach until they’re at their desired tempature.
Like a lot of other things let them rest before you cut into them so they stay more moist. You can make any kind of sausage you want. Get creative with it. 


Enjoy your homemade sausages. Try some new things and let me know what you try. Ask me for some ideas. Share this with your friends and I’ll do a post about how to make your own salami in a later post. 

Cheese and cheese boards 

All about cheese. As a kid I get up not far from the Tillamook cheese factory here in Oregon. It was amazing. Seeing how some of the best cheese in the country is made, start to finish. I grew up eating a lot of cheddar and swiss. Pretty standard decent cheeses. I wouldn’t touch American cheese them, because I couldn’t do the taste and now, because I’ve learned it’s very close in composition to plastic. 
However as I got older I realized that cheese isn’t a simple thing. There are thousands of different cheeses with different flavors and purposes. In this post I’m going to focus on a good cheese board and some differences in classifications of cheese. 
First of all let’s look at the main way cheese is classified, by it’s hardness. Cheese is separated into 4 groups this way. Soft, semi soft, semi hard and hard. This makes it far easier to find the cheese you want. For a good cheese board you want all 4. A full, well rounded experiance of cheese. Below I will post a helpful chart on how some cheeses are categorized, so you better understand the idea. 

The harder the cheese the more difficult it is for it to melt. American cheese melts extremely easy, because it’s a soft cheese. You can put a decent sized slab on top of it and it would melt just fine. That’s why pizzas are generally made with mozzarella, because it melts so easily. When I make my Alfredos when I add my Asiago or parmesan cheese it has to be shredded pretty fine to melt properly. Also the aging process makes cheese not melt as well. Most cheeses are hard because they’ve been aged a long time like parmesan. It changes the composition and makes it saltier and harder. 

When I put together a cheese board I put one of several of each cheese on. I will also look to put a nice rustic bread on my board. Cheese and bread are so nice together. I love spreading a soft cheese over crusty bread. The texture and flavor are incredible. This is one of those simplicity is bliss things. I always warm my bread and slice it relatively thick. Try something with a gentler flavor like a light sourdough or a baguette. 

Crackers are a classic on cheese boards. I prefer crackers for harder cheeses. Remember to slice your hard cheeses very thin. The cracker holds up much better than bread against these cheeses. Again likewise with bread pick a flavor neutral cracker. With it being eaten with a hard cheese that’s already salty, pick a cracker that is light on the salt. 

The best fruit for a nice cheese board is something mildly sweet and tart. This lets the cheese bloom and is a good underdone to the rich and salty cheeses. I really like fresh figs and grapes of several varieties on my board. It gives you options and flavor and allows you to eat a lot of cheese. Apple’s can also be nice, especially a green apple. 

Wine and cheese to me is almost as good as it gets. Due to the rich and salty nature of cheese a light red wine is my preference. It changes by what cheese I’m eating, but pinot noir is usually my go too. A generally smooth, gentle and fruity red wine it helps cut the fattiness of the cheese, without overpowering it. Never over power your cheese it defeats the purpose. Chianti can also be nice. It’s mildly spicy and aromatic it’s better for more flavorsome cheeses like a hard Asiago or blue cheeses. White wines can go well with a lighter, summery cheese board. If you choose a white wine make sure it’s fruity and tart. 

Blue cheese is an interesting thing. It’s the least popular of all the cheeses. It’s packed in flavor and it has a pungent odor that is off putting for a lot of people. Blue cheese is moldy, it’s injected with penacillium to encourage the bacteria growth. This mold is what gives blue cheese it’s salty and sharp flavor. This is also why it has the pungent flavor and blue veins. Blue cheese comes in many types too some more mild than others. 

Tips for cooking a Chefs dream protein: Duck

Duck is an incredible protein. It’s by far in my top 3. I love it for its flavor, as well as its versatility. I could sit here for an hour and riddle off duck dishes to cook. I’ll spare you that and give you a few of my favorite ideas.
Think of duck like a very fatty chicken that’s all dark meat. I know some people don’t like dark meat, but give duck a shot anyway. You breakdown a duck nearly identically to how you’d break down a chicken. The way you cook it is different though. You can utilize every part of the duck. 
The simplest way to cook a duck is to season, rub oil on it and roast it whole. A roast duck is very nice. Low and slow for this to let the fat render. I reccomend scoring the skin, this will also help the fat render. Duck like I said earlier is fatty, so you want to render a lot of that fat out to get a crispy skin. A crispy skin is key for a good roast duck. 

Confit is a cooking method I wrote a blog about not long ago. Duck lends itself well for this. Duck confit is incredible. Simmer in olive oil with parsley, thyme and garlic for hours until it’s crispy and the flesh is falling off of the bone.
Always use the leg and thighs for this. They have the most connective tissue and do the best this way. It’s so simple to do this. Just put it on the stove and simmer until done. This is really a crowd pleaser too. I would argue it’s far better than bacon even.

If you make duck confit, you can now make rilettes out of that. This is almost like a duck spread. Duck confit with chopped herbs, shallots, duck fat and a little bourbon. I chill mine and have it ready in jars in the refrigerator. It’s a great snack, or appetizer on some warm bread, or a cracker.
Duck breast is fantastic. Get a nice hot pan for this and a miniscule amount of oil or butter. Cook it like you’re cooking a steak in a pan. You want to make sure your duck is salted and dry when you put it into your pan. Always sear it skin side down with the skin scored. 
Cook it 70 percent the way on the skin. You want a nice dark golden brown. When you flip add butter, maybe a compound butter and baste it. You should have a nice crispy duck breast, flavorsome and medium rare. Yes medium rare. Duck breast goes tough quickly when you overcook it. Medium rare makes for the best result in texture and flavor. 

Foie gras is arguably the best part of a duck. It’s the fatty liver of a duck raised for that purpose. This is a hot topic, because most places force feed the ducks with tubes to make sure the liver is engorged. It isn’t humane in some places. Some places do it better. Some places in Spain let the ducks rome fields with nuts. The ducks gorge themselves and you get the desired result. Not only is this more humane, but it tastes better too.
Foie gras is like duck butter. It’s one of the most delicious things I’ve ever eaten. Just sear it and put it on some toast it’s perfect. In a hot pan with no fat sear golden brown on both sides and serve. 

Try a few ways to enjoy an oyster 

Oysters are really delisuous. Oysters have the most wonderful ocean flavor. It’s like salty ocean breeze. I love raw oysters. A lot of people have written off oysters, because they tried them raw once and they hated the texture. The texture of a raw oyster can be off putting for people who are texture oriented. When you buy a whole oyster you have to shuck it. Take an oyster knife to the joint of the oyster. It’s the part of the back where the little indent is. Gently place the tip of the knife in and rock slowly back and forth. This will pop the oyster open. Then pull the top off and separate the oyster from the bottom by gently running the knife around the bottom of the oyster. 

When I eat a raw oyster I like a splash of Tabasco, or lemon juice. The acidity does wonders with the salty ocean flavor. A  mignonette is a nice touch too. It’s vinegar, or lemon juice with shallots and sometimes liquor or honey. Just a tiny bit goes a long way. 

When you go to buy an oyster make sure it’s closed. Oysters are alive when they’re closed and they go bad quickly when they’re not quite closed. Scrub the outside of the oysters well to make them look nicer. Be mindful when you harvest oysters to check for red tide warning. This is where there’s been a algae boom and shellfish harvested in that area shouldn’t be eaten. They can be very dangerous. 

 When a raw oyster doesn’t suit your fancy try cooking them like something more relatable. Fry frying oysters. Fried oysters can be incredible. They’re already seasoned, I simply flour them, eggwash and coat them in panko. They cook extremely quickly. Serve them with some dipping sauce like a herbed aioli. 
Try putting the fried oysters on a sandwich like a po-boy. A baguette toasted with a spicy remoulade, tomatoes, onion and lettuce. The oysters go perfectly on this sandwich. Fried oysters also go really well with cole slaw. 

Baked oysters can also be nice. When you cook an oyster the texture is much nicer. It’s firm not slimy. When you bake an oyster try removing them and adding some mayo, herbs and bread crumbs to the oyster and baking it in the shell. These make for a really wonderful appetizer. Just serve with an aioli and lemon. 

What you need to know about tuna 

For the longest time most thought of tuna as the cans you buy for 50 cents that you mix with mayo and put on bread. Tuna is much much more than that. Canned tuna is all the scraps and lesser quality tuna cooked way longer than it should be. It’s dry and bland. It needs tablespoons of mayo to be attractive to eat. 

Tuna steaks can be really nice.  You need to make sure the tuna is of good quality. Good tuna is deep read and stays together nicley when you slice it. Most tuna at the grocery store has been frozen, so I reccomend a fish market. 

In my opinion, and that of most chefs, tuna should be seared all around and sliced. A nice tuna niscoise salad is great. Green beans, fingering potatoes and niscoise olives tossed in a simple dressing with your tuna sliced over top. 
When I sear my tuna I use sesame oil and get it smoking hot and sear it all around until it’s a nice golden brown all around. I set it aside and let it rest a bit. Slice it thin, it’s relatively dense, the texture is nicer if it’s sliced tjin.
Eating fresh tuna raw is also nice. However when you eat raw fish you always need to make sure it’s never been frozen and it’s fresh. If it’s not fresh and it has been frozen i won’t usually eat it raw it’s just a safety thing. Being safe is the most important.
Poke is nice with tuna. It’s sliced red and green onions, soy sauce, sesame oil and the tuna diced small. It usually has a little more than that, but that’s the just of it. Raw fresh tuna of course is always nice on sushi.

Tips to take the challenge out of Salmon 

I lived in Alaska on and off for years and one of the best ingredients there was the incredible salmon and crab. Almost everyday, all summer long I would come into work and fillet at least 2 big king or sockeye salmon. Fish can be intimidating, but it shouldn’t be. 
Salmon is great, it has it’s own distinct flavor, yet it’s light and takes on other flavors well too. Stay away from pink or chum salmon. I used chum salmon for bait and pink salmon for smoking. They don’t have the most pleasant and clean flavor you want out of a salmon. King salmon, or Chinook depending on what you call them where you live, are nice and large. King salmon to me has a little bit of a generic flavor compared to sockeye. Chinook is so popular, because of their large size. Sockeye is flavorsome and contains the least amount of mercury. The fillets that come off of a sockeye salmon have a very bright and distinct color.  Coho salmon is also pretty nice. It’s similar to the taste of a king salmon, just a bit smaller. 
I always prefer fillets over steaks. I think steaks don’t look as nice and they’re more of a pain to eat. Usually in super markets salmon comes fillet and with the pin bones already removed. Also I find salmon cooks more evenly cut into fillet portions rather than steaks. 
Look at the label in the case. Wild caught is always better. Farmed fish isn’t good. They feed it corn pellets and something to make the flesh look kind of how it’s supposed to. The flesh should look bright, not washed out or faded. Look for salmon that hasn’t been frozen. Previously frozen salmon will almost always end up being dry and it makes it harder to cook, because it’ll be falling apart more. This will also drain it of a lot of its flavor. 
Try cooking it skin on. A nice crispy skin can be nice on A salmon. I prefer it myself. If you don’t like the skin and don’t want to ruin your fillet by trying to skin it, cook it skin on and it’ll just come right off with your fingers. 
When it comes to cooking your salmon I prefer to pan sear, bake or eat it raw. Salmon is nice on sushi and in poke if it’s fresh and fatty. When I sear mine I just heat a pan up with some oil in it and put it skin side down in the pan. Let it cook about 70 percent the way on the skin and flip it. It will finish soon after. You can see it when you cook your salmon in a pan how cooked it is by looking at the side. Salmon is nice medium rare. When you bake it just season it and put it skin side down in a oven around 350 degrees until it’s done. It really is that simple. 

Easy beef Wellington 

Beef Wellington was an intimidating dish for me to cook at first. It seemed difficult, but making a few for dinner is really an easy thing to do. A beautiful fillet mignon in puff pastry. What you’ll need:

Fillet mignon 

Stone ground mustard 

Prosciutto 

Portobello mushrooms

Thyme 

Oregano 

Basil 

Parsley

Puff pastry 

Salt/pepper 

Eggwash 
First of all you’ll cut your fillet into about 4 inch long rounds. This makes them look nicer and cook more quickly. Sear your fillet until nice and brown on all sides. While still hot rub your mustard on it. Lightly coast it. The beef will absorb a lot more mustard flavor while it’s hot. 
Blitz your mushrooms and herbs in a blender. Add this to a sautee pan with no oil and cook out all the moisture from the mushrooms. 
Set your prosciutto out on plastic wrap. Enough that it’ll wrap all the way around the beef. Place your mushroom mixture on top of the prosciutto in a thin even layer. Place your fillet down now and wrap around tight. 
Now you can wrap it in your puff pastry coated in eggwash. Pinch the seems tight and score the top of the puff pastry. Place on your baking sheet seem down and bake until your desired tempature is reached. I reccomend using a digital thermometer. You won’t be able to feel the beef for doneness so this takes the guess work out of It.
When it’s done, rest it for around 8 minutes and slice into thick slices. I like to slice mine around 1 inch thick. 

Tips for a better pizza 

Pizza is one of the most popular food items in the United States and other places in the world. So many kinds, so many variations. The debates they create like does pineapple belong on a Pizza, thick vs thin crust and how much sauce and cheese is too much? I’m here to give you some tips for making and ordering a better pizza.
First of all my number 1 pizza tip especially when your making it is this. Make every component equal. Make a decent crust, make a tomato sauce like the one i wrote a recipe for in a previous blog and don’t go overboard on the toppings. You want a pizza where every component comes together to make it a great pie, not just a little crust with toms of sauce and cheese and toppings. 
The crust is very important. I like to go with a medium thickness. Too thin and it will lack that texture you want. You want a little crunch a little bite. Too thick and it’s too bready and the pizza will just be unbalanced. Also a medium crust is good for cook time. 
The sauce is important. I have a recipe for a good tomato sauce in a previous blog post that can be easily modified for the purpose of a pizza. I never reccomend using a pasta tomato sauce. It never tastes right. You can also use a white sauce, pesto, or even just olive oil with some salt and pepper. Choose what sauce you’re going to select by what toppings and cheese is going on top of it. Be careful not to oversauce your pizza. This is very common and it will overpower the other components and make your crust soggy faster. 
Most of the cheese used for pizzas are mozzarella or provolone. I suggest using a mix. Mozzarella and provolone melt easy and have a nice mild flavor, this is why I always add parmesan or Asiago to give it some salty sharpness. Smoked cheeses are also a nice touch. Baratta is a stuffed mozzarella that’s nice to finish a pizza with as a topping too. 
This is where most of the debates begin. I personally really dislike pineapple on a pizza, but if that’s what you like go for it. As far as toppings go, keep it simple. Don’t just throw things on. Pick 3 or 4 things that go really well together and put those on proportionally. Try mixing some different textured ingredients. A little crunch, smooth and soft go well together. Maybe try something salty, something mildly spicy and something creamy. Maybe pancetta, pickled peppers and baratta. Balance is key when making a pizza.